-
More Resources
-
Updates & Announcements
-
340B Architect
-
340B Impact
-
340B RxCorrelate
-
340B Monitor
-
340B Written Location
-
340B Central Split
-
All About Architect Webinar Series
-
More Resources
-
Right Side Callout
-
Release notes
-
Recent Manufacturer Notices
-
More Videos
Overview
From the Entity Groups Page within the User Access menu, you can view, add, and edit Entity Groups within Corporate IDs. Creating Entity Groups is a way to group hospitals and pharmacies together, allowing you to later manage access to this data at the group level instead of adding HIDs/PIDs to Users or User Groups manually.

Entity Group: a group of HIDs/PIDs. For example, “Northeast Region Pharmacies” or “Covered Entity- Owned Pharmacies”. If a Hospital is included in Entity group, all Pharmacies that are linked to that Hospital will be included as well.

When you arrive on this page, you will see the Entity Group names and a description of each group.
- All columns are sortable alphabetically. Click the column header to switch between ascending and descending order.
- Use the search bar to look for specific Entity Group names or descriptions.
- For longer names or descriptions, hover over the name or description to view the entire content.
Entity Group Best Practice
We recommend that you add Hospitals to an Entity Group instead of Individual Pharmacies because any new pharmacy added to the Hospital will automatically get included in the Entity Group. See “Adding Hospitals to Entity Groups” below.
Editing Entity Groups
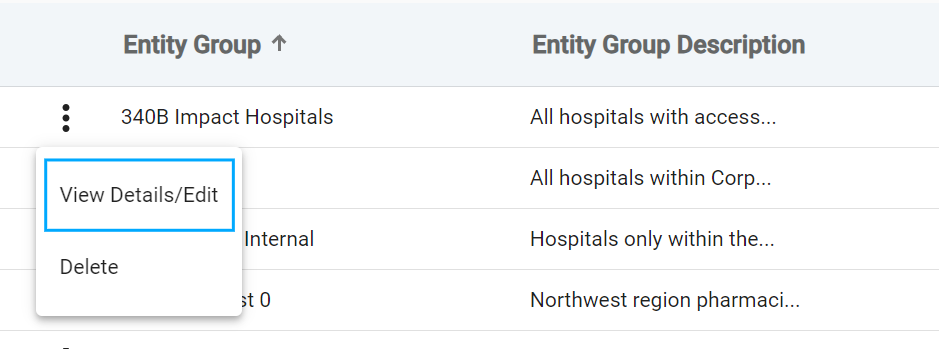
To edit previously existing Entity Groups, click the ellipsis to the left of an Entity Group name, and then View Details/Edit.
Select Edit at the top of the Edit Entity Group page to activate edit mode.
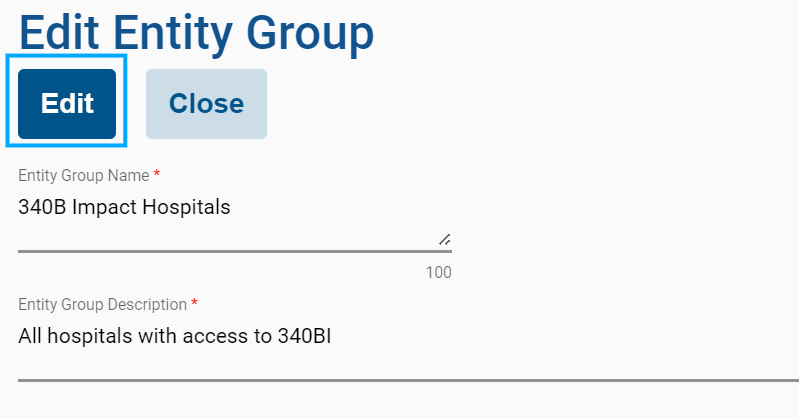
The following fields will now be editable:
- Entity Group
- Entity Group Description
While in edit mode, you can also remove or add hospitals or pharmacies to the Entity Group in the tables below by using the Add Hospital/Pharmacy button or the trash can icon. See the instructions below for more details.
After making changes, click Save to keep your changes and return to the Entity Groups page. If you make changes (any modification to the page) and click Cancel, a confirmation popup will display with two options:
- Exit: changes will not save, the current page will close and return to the Entity Group page
- Continue Editing: the page will remain open in edit mode
Adding a New Entity Group
Click the Add New Entity Group button at the top of the Entity Group page.
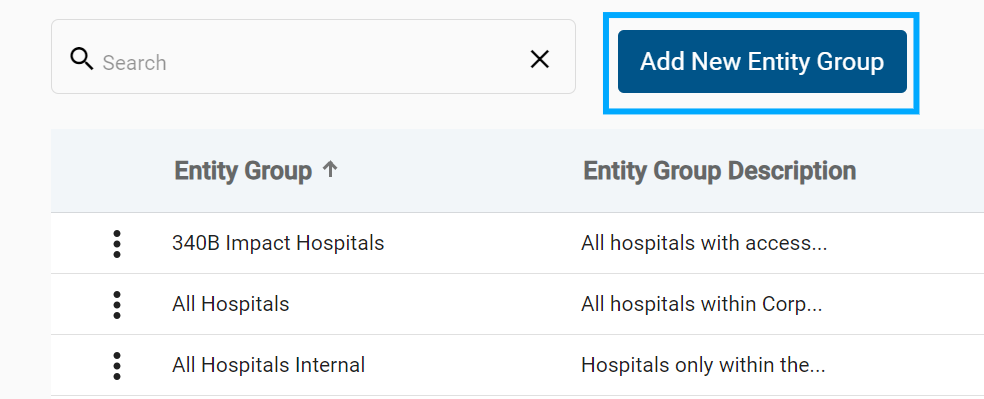
The Add New Entity Group page will open, allowing you to add the following information.
-
Entity Group Name: required, 100 character limit.
- Ex: California
-
Entity Group Description: required, 500 character limit.
- Ex: PIDs in California

Click Save to finish adding a new Entity Group.
Adding Hospitals to an Entity Group
To add a hospital to an Entity Group, click the Add Hospital button below the Hospitals table header.

A list of potential HIDs will be displayed, including all hospitals within the Corporate Parent you have access to. In addition, you will see the Hospital Name, Location (City/State), and 340B ID for each HID.
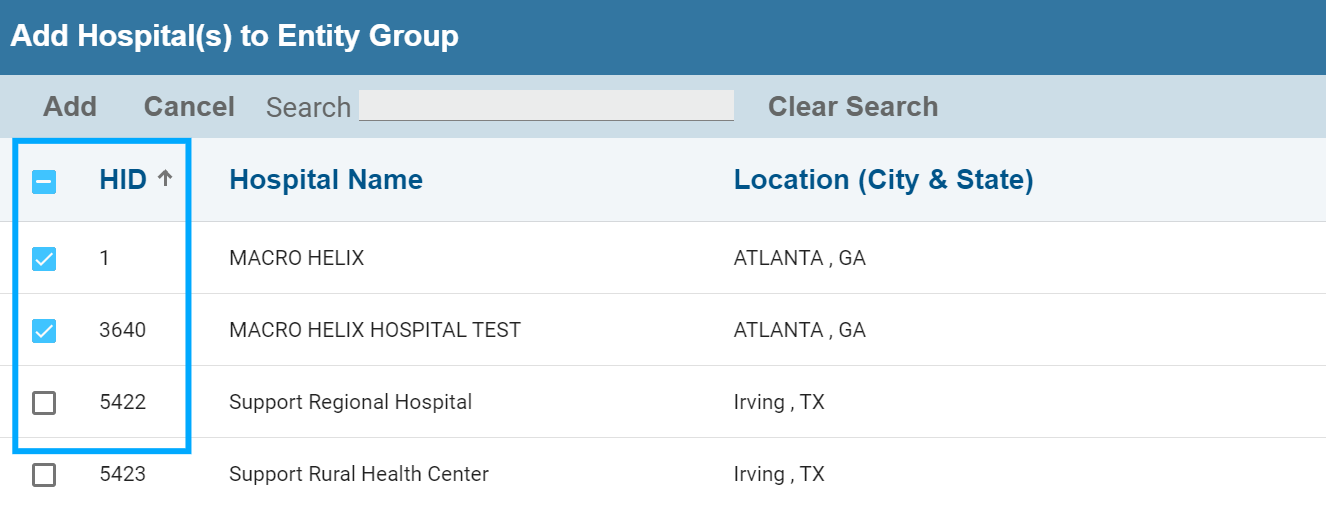
Select any HIDs from the list that you would like added to the Entity Group.
- If you would like to add all HIDs, click the checkbox next to the HID header.
- Use the search bar to look for a specific HID, Hospital Name, Location, or 340B ID.
Click Add to apply the selections and return to the Add New Entity Group page. If you click Cancel with or without making any changes, you will return to the Add New Entity Group page without adding any HIDs.

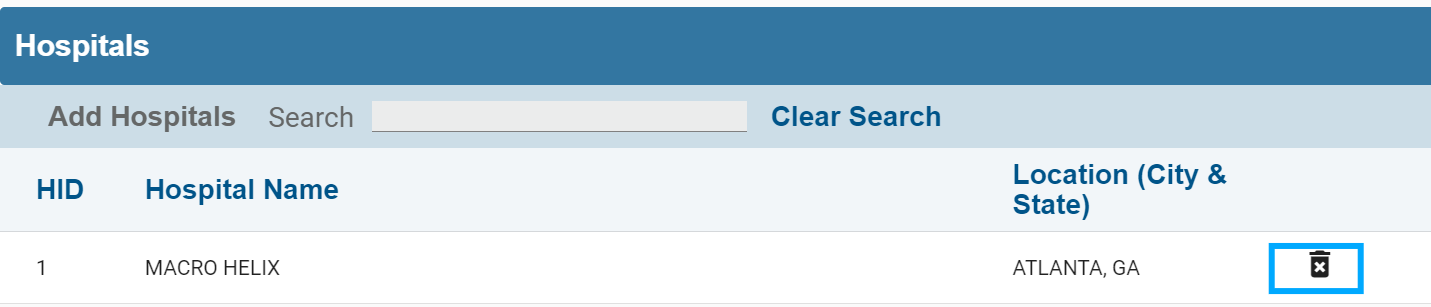
After clicking Add, you will see the added HIDs in the Hospitals table, which will display the HID and Hospital Name.
Adding Pharmacies to an Entity Group
To add a pharmacy to an Entity Group, click the Add Pharmacies button below the Pharmacies table header.

A list of potential PIDs will be displayed, including all active pharmacies within the Corporate Parent you have access to. In addition, you will see the Pharmacy Name, Chain Name, and Location (city and state) for each PID.
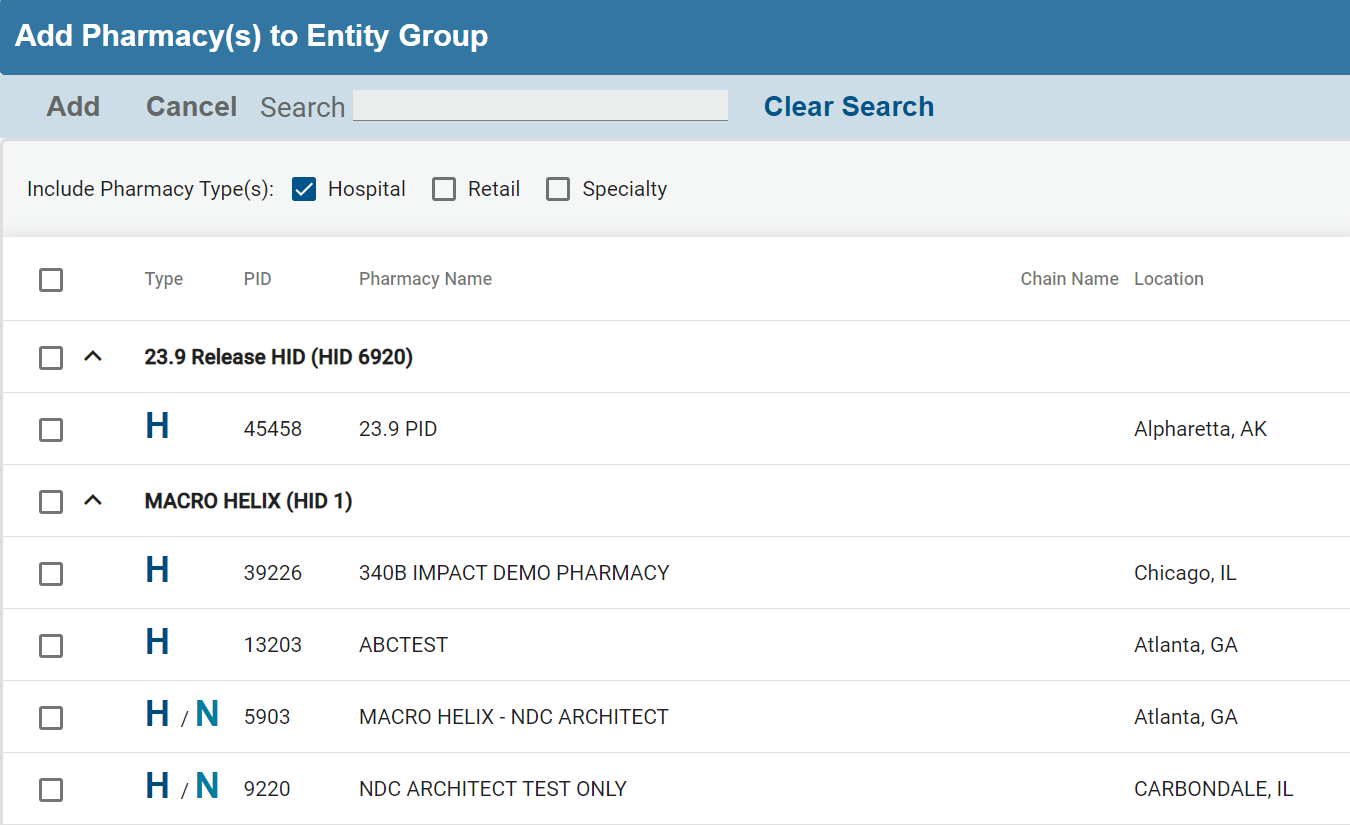
Select any PIDs from the list that you would like added to the Entity Group.
- If you would like to add all PIDs, click the checkbox next to the HID header.
- Use the search bar to look for a specific PID, Pharmacy Name, Chain Name, or Location.
- Filter the pharmacy list by checking the Hospital, Retail, and Specialty boxes next to Include Pharmacy Types. The pharmacy type indicator (ex: H, R) will appear to the left of the pharmacy name.
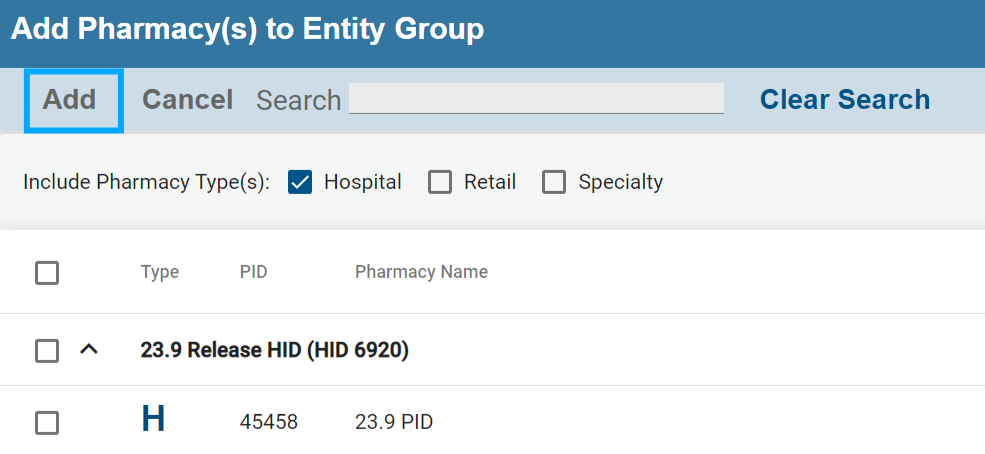
Click Add to apply the selections and return to the Add New Entity Group page. If you click Cancel with or without making any changes, you will return to the Add New Entity Group page without adding any PIDs.
After clicking Add, you will see the added PIDs in the Pharmacies table, which will display the PID and Pharmacy Name.
You can click the column headers to sort or use the search bar to look for a specific pharmacy.
Deleting Hospitals or Pharmacies from Entity Groups
To delete Hospitals or Pharmacies from the Entity Groups Page, click the trash can icon within the respective table.
Errors:
There are some cases where attempting to delete an Entity Group could result in an error. This could mean the group is associated with another active User Group, Role, or Entity Group.
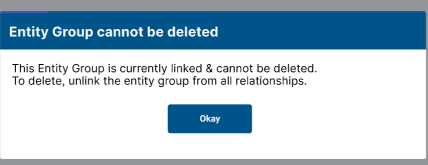
If this is the case, you may need to unlink the Entity Group from all of the relationships.
This action will be displayed in the transaction log, along with the user name of the person who deleted the entity group, the date, and the name of the entity group deleted.
Saving Entity Group Changes
After adding an Entity Group and making the desired hospital selections, make sure to click Save at the top of the page. After clicking Save, the new group will appear on the Entity Groups page.

 Access Management Page